Consulting
Service
As a core crushing equipment in industries such as mining and building materials, the quality of installation and commissioning of impact crushers directly determines the stability, crushing efficiency, and service life of the equipment. A scientific and standardized installation process is the foundation for safe operation, while precise and meticulous commissioning is key to maximizing the equipment's performance. Deviations in installation or unreasonable commissioning parameters can easily lead to equipment vibration, accelerated component wear, insufficient capacity, and even safety accidents. This article, based on practical experience with the 1600-type impact crusher, provides a systematic guide for equipment installation and commissioning, covering pre-installation preparation, core installation procedures, phased commissioning, and precautions, helping companies avoid risks and improve production efficiency.

Pre-installation Preparation: Building a Solid Foundation
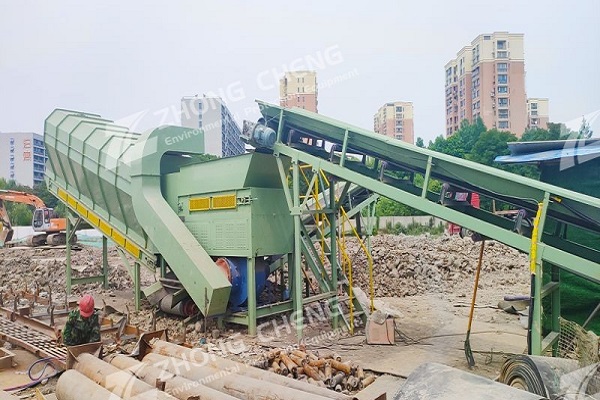
1. Site and Foundation Preparation The installation site must meet the equipment's operational requirements. The ground must be flat and hard, with a bearing capacity of no less than 1.2 times the total weight of the equipment (for the 1600-type impact crusher, a foundation bearing capacity of ≥250kN/m² is recommended). 1. Concrete Foundation Construction: Pour concrete foundation according to the equipment foundation drawing, pre-drilling anchor bolt holes. The hole depth and diameter must meet design requirements (usually, the hole depth is 1.5-2 times the bolt length). The foundation curing period should be no less than 28 days to ensure the strength meets standards. Simultaneously, plan the equipment layout, reserving feeding and discharging channels and maintenance space (at least 1.5m operating distance around the perimeter). Construct a rain and sun shelter to prevent the equipment from being affected by severe weather.
2. Equipment and Tool Inspection: Unpack and inspect the equipment to ensure all parts are complete and in good condition. Verify the model and quantity of key components such as the main unit, motor, impact frame, hammer, and liners. Check for any deformation or damage caused during transportation. Pay special attention to the wear condition of the hammer and liners, and the sealing condition of the bearings, ensuring there are no cracks or rust. Prepare necessary installation tools, such as a crane (with a lifting capacity greater than 1.2 times the weight of the largest component), a level, torque wrench, and a spirit level. Also prepare auxiliary materials such as anchor bolts, nuts, washers, and lubricating oil.
Core Installation Process: Precise Operation and Step-by-Step Implementation

1. Main Unit Installation: Use a crane to hoist the main unit onto the foundation. Adjust the main unit's position to align the inlet and outlet with the process flow. Use a level and spirit level to correct the main unit's horizontal and vertical alignment. The horizontal error of the frame should be ≤0.2mm/m, and the vertical error ≤0.3mm/m. Place the anchor bolts into the pre-drilled holes and pour secondary grout (using high-strength, non-shrink grout). After the grout reaches the design strength (usually after 7 days of curing), tighten the anchor bolts to the specified torque using a torque wrench (the tightening torque must meet the requirements of the equipment manual, generally 300-500 N·m). Ensure the main unit is firmly fixed and not loose.
2. Transmission System Installation: Install the motor and coupling. The motor base needs to be leveled to ensure the coaxiality error between the motor shaft and the main unit's transmission shaft is ≤0.1mm, and the parallelism error of the two end faces of the coupling is ≤0.2mm. If belt drive is used, adjust the motor position to align the pulleys and ensure moderate belt tension (pressing the middle of the belt should result in a 10-15mm deflection) to prevent belt slippage or wear during operation. Install a protective cover to ensure adequate protection of transmission components and prevent accidents.
3. Impact Frame and Hammer Installation
Install the impact frame and adjust the gap between it and the rotor (initial gap recommended is 20-30mm, which can be fine-tuned later according to the required output particle size). The gap must be uniform. Secure the impact frame position using adjusting screws or shims. Install the hammers, ensuring they are evenly distributed on the rotor by weight, with a single hammer weight error ≤50g to prevent unbalanced vibration during rotor operation. Ensure bolts are tight during hammer installation and use anti-loosening washers to prevent them from falling off during high-speed rotation.
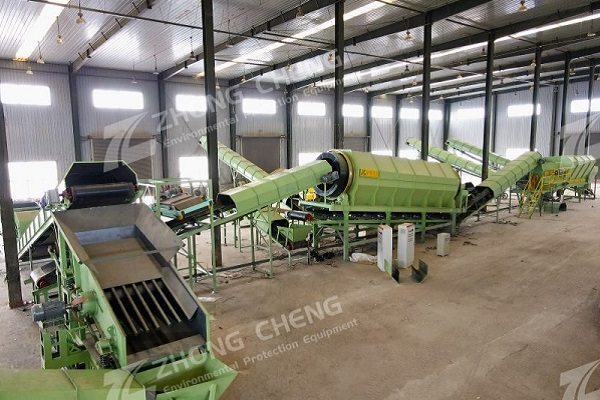
4. Auxiliary System Installation
Install the feed hopper and discharge conveyor, ensuring smooth connection between the feed hopper and the main unit's feed inlet without any leakage gaps. The height and angle of the discharge conveyor must be appropriate to ensure smooth discharge. Connect the lubrication system, check the lubrication lines for blockage, and add suitable lubricating oil (usually No. 46 anti-wear hydraulic oil or gear oil). The oil level must be within the range specified on the oil level indicator. Install the electrical control system, connect the motor, sensors, control cabinet, etc., and check that the wiring connections are correct and the grounding is reliable.
Phased Commissioning: Gradual Improvement for Enhanced Performance

1. No-Load Commissioning Before no-load commissioning, recheck the installation of each component, ensuring bolts are tight, lubrication is sufficient, and protection is in place. Connect the power supply and start the equipment for no-load operation for 2-4 hours, observing the equipment's operating status: the rotor rotates smoothly without significant vibration (vibration speed ≤ 4.5 mm/s); the bearing temperature is normal, and after 1 hour of operation, the temperature ≤ 75℃ with no abnormal temperature rise; the motor current is stable without overload; there are no oil or material leaks at any sealing points. If excessive vibration or abnormal noise occurs, immediately stop the machine for inspection, adjust the rotor balance, or tighten the components.
2. Load Testing: After successful no-load testing, conduct load testing, gradually increasing the feed rate (starting from 30% of rated capacity, increasing by 10% every 30 minutes until full load), and running continuously for 4-8 hours. Key monitoring points: Whether the output particle size meets requirements (optimized by adjusting the impact frame gap); particle size uniformity error ≤10%; motor current stable at 80%-90% of rated current, without frequent overload; normal contact between the hammer and liner, without violent impact noise; equipment throughput reaching design standards (the rated capacity of a 1600-type impact crusher is typically 150-300 t/h, subject to equipment parameters). During this period, regularly check the temperature, vibration, and tightness of each component; immediately stop the machine if any problems are found.
3. Optimization and Testing: Optimize parameters based on the load testing results: If the output particle size is too large, reduce the gap between the impact frame and rotor; if the particle size is uneven, check the hammer wear or adjust the feed uniformity; if the capacity is insufficient, check whether the motor power is matched or if there is material blockage. After commissioning, record the optimal operating parameters, such as the impact frame gap, feed rate, and motor current, to provide a reference for subsequent stable operation.
Installation and Commissioning Precautions

Strictly adhere to the installation principle of "fixing before connecting, main unit before auxiliary units" to avoid rework due to incorrect installation sequence.
All connecting bolts must be tightened to the specified torque. Key components (such as the hammer and coupling) must be secured with anti-loosening measures to prevent loosening and detachment during operation.
During commissioning, operators must stay away from rotating parts of the equipment. Opening the maintenance door or touching transmission parts while the equipment is running is strictly prohibited. A dedicated person must monitor the process, and immediately press the emergency stop button if any abnormality is detected.
Keep detailed records of the entire installation and commissioning process, including foundation dimensions, installation deviations, commissioning parameters, and equipment operating status, to facilitate subsequent maintenance and troubleshooting.
After successful commissioning, train operators to familiarize them with the equipment operating procedures, parameter adjustment methods, and safety precautions to avoid improper operation that could affect equipment efficiency.
The installation and commissioning of the impact crusher are crucial for ensuring long-term stable operation and maximizing the equipment's efficiency. From basic preparation to precise installation and scientific commissioning, every step requires strict attention to detail and adherence to technical specifications. Through standardized installation procedures, meticulous commissioning, and comprehensive safety measures, we can ensure equipment stability and crushing efficiency, extend equipment lifespan, reduce operating costs, and lay a solid foundation for subsequent production operations.
The installation and commissioning of an impact crusher is a systematic and meticulous project that requires strict adherence to technical specifications and operating procedures. From solid site preparation and precise control of component installation to the gradual no-load and load commissioning, each step directly affects the equipment's performance. Standardized installation ensures accurate equipment positioning and secure connections; scientific commissioning optimizes operating parameters; and comprehensive safety management and record tracking effectively reduce equipment failure rates and fully leverage its advantages of high crushing efficiency and excellent output particle size. Following this guide will help companies quickly put their equipment into operation, achieving long-term stable and efficient production, providing a solid guarantee for industry capacity improvement and cost control.


Company: Zhengzhou ZhongCheng environmental protection equipment co., LTD

Company address: 36 xueyuan road, Zhengzhou City, Henan Province, China.

Whatsapp:+86-18738194110


Our Email

Our phone
 86-18738194110
 86-18738194110

Save Time! Get A Detailed Quotation Quickly.


 2026-04-22