Consulting
Service
As essential equipment in industrial production and material handling, shredders are prone to various malfunctions over extended periods of operation, impacting production efficiency. Mastering scientific maintenance methods not only quickly restores equipment to service, but also extends its service life and reduces production costs. The following detailed guide covers key shredder maintenance techniques, including pre-repair preparation, common troubleshooting and repairs, daily maintenance, and safety precautions, to help operators and maintenance personnel systematically master maintenance skills.
Pre-Repair Preparation
Before beginning shredder repair work, thorough preparation is essential for ensuring a safe and efficient repair. This primarily involves safety preparation, tool preparation, and equipment status inspection.

1. Safety Preparation
Safety is paramount during maintenance work, and the following safety measures must be strictly implemented. First, the operator must disconnect the shredder's main power supply and display a "Equipment Maintenance, Do Not Close" warning sign at the power switch to prevent accidental activation and personal injury. Second, if the shredder is connected to a compressed air or hydraulic system, the system pressure must be released to prevent the risk of ejection of components due to residual pressure during the repair process. Finally, maintenance personnel must wear personal protective equipment (PPE), such as hard hats, non-slip gloves, safety glasses, wear-resistant work clothes, and safety shoes. This is especially true when handling sharp parts or repairs that may generate debris. Protective equipment can effectively reduce the risk of injury.
2. Tool Preparation
Preparing appropriate repair tools based on the shredder's structural characteristics and potential fault types can significantly improve repair efficiency. Common tools fall into two categories: general-purpose tools and specialized tools. General-purpose tools, such as wrenches (open-end, ring-end, and socket), screwdrivers (slotted and cross-shaped), pliers (needle-nose, diagonal, and slip-joint pliers), hammers, tape measures, and levels, are primarily used for disassembling and installing common equipment components. Specialized tools, such as pullers for spindle disassembly, tool grinders, bearing installation tools, and hydraulic rams, should be tailored to the shredder model and brand. These tools ensure component integrity during repairs and ensure accurate installation. In addition, you should also have necessary testing equipment, such as a multimeter (for checking electrical circuit continuity and motor insulation), a tachometer (for checking motor and spindle speed), and a thermometer (for measuring the operating temperature of bearings, motors, and other components) available to accurately determine the cause of the malfunction.
3. Equipment Condition Inspection
Before repairs, a preliminary inspection of the shredder's overall condition is necessary to provide guidance for subsequent troubleshooting. First, inspect the machine's exterior to check for obvious deformation or cracks, loose or missing bolts, and the integrity of safety features such as protective covers. Next, check the machine's lubrication system to ensure the lubricating oil level is within the specified range and that the oil is clear and free of impurities. If the oil level is too low or the oil has deteriorated, refill or replace the lubricant to prevent further wear on components caused by poor lubrication. Finally, manually rotate the shredder's spindle (with the power off) to check for smooth rotation and any signs of sticking, unusual noises, or resistance. If any abnormalities are present, it can be considered a potential malfunction in the spindle, bearings, or cutter.
Common Troubleshooting and Repair

Common faults during shredder operation occur primarily in the motor, cutter, bearings, and feed system. Different faults manifest themselves and require specific repair methods, requiring targeted troubleshooting and treatment.
1. Motor Failure
The motor is the shredder's power source. If a motor failure occurs, the machine will not start or operate properly. Common faults include motor failure, excessive motor overheating, and unusual noises.
a.Motor Failure to Start
If the motor does not respond after pressing the start button, first check the electrical circuit. Use a multimeter to check the power supply voltage (typically 380V for three-phase motors and 220V for single-phase motors). If the voltage is abnormal, contact an electrician to inspect the power supply circuit. If the voltage is normal, check the motor's power and control cables for breaks, shorts, or poor contact. Check the terminal blocks for loose or oxidized wires. If any problems are found, reconnect or replace the wires. If the wiring is normal, further check the motor's overload protection device (such as a thermal relay). If the overload protection triggers, first investigate whether the device is overloaded. Once the cause of the overload has been eliminated, press the reset button to resume motor operation. If the overload protection does not trigger, the motor's stator winding may be burned. Disassemble the motor and inspect the windings for signs of blackening or scorching. If burnt is confirmed, have a professional rewind the windings or replace the motor.

b.Severe Motor Overheating
Excessive motor temperatures during operation (exceeding the specified range, typically the motor housing temperature should not exceed 70°C) can shorten the motor's lifespan and even cause it to burn. First, check the motor's load. If the shredder is fed too much material, the material hardness exceeds the specified range, or foreign matter such as metal is mixed in the material, the motor may be overloaded. Reduce the feed rate, remove any foreign matter, or replace the blades with those suitable for handling high-hardness materials. Next, check the motor's cooling system to see if the cooling fan is damaged or if the fan cover is clogged. If the fan is damaged, replace it. If the fan cover is clogged, clean any dust and debris to ensure unobstructed heat dissipation. Additionally, motor bearing wear or poor lubrication can also cause motor overheating. Remove the motor end cap and inspect the bearings for wear, rust, or seizure. If the bearings are damaged, replace them. If the lubrication is poor, refill or replace the dedicated bearing grease.
c.Abnormal Motor Operation
If the motor makes unusual noises during operation, such as a "buzzing," "squeaking," or "grinding" sound, stop the motor and inspect it immediately. If a "buzzing" sound is heard and the motor speed drops, the motor may be operating with a missing phase. Check the power cord for a broken phase or poor contact in the contactor. Repair the broken circuit or replace the contactor. If a "squeaking" sound is heard, it's usually due to severe bearing wear or dried-up grease. Disassemble the motor to inspect the bearings, replace damaged bearings, and refill with an appropriate amount of grease. If a "grinding" sound is heard, the gap between the stator and rotor may be uneven, or the rotor shaft may be bent, causing rubbing. Measure the stator-rotor gap and adjust it if uneven. If the rotor shaft is bent, straighten it or replace the rotor.
2. Cutter Failure
The cutter is the core working component of the shredder and directly affects the shredding performance. Common failures include cutter wear, cutter breakage, and cutter jamming.

a.Cutter Wear
After prolonged use, the cutting edge of the cutter gradually wears due to friction with the material, resulting in reduced shredding efficiency and excessively large particle sizes. Regularly inspect the cutter for wear. If the wear is minor, use a cutter grinder to repair the edge. Carefully control the amount of grinding to ensure that the cutter size and angle meet the manufacturer's specifications. Avoid over-grinding, which can weaken the cutter. If the cutter is severely worn, with noticeable chipping or deformation on the cutting edge that cannot be repaired by grinding, a new cutter must be replaced. To replace the cutter, first remove the cutter shaft cover, loosen the cutter retaining bolts, remove the old cutter, clean any debris from the cutter shaft and cutter mounting surface, then install the new cutter according to the manufacturer's markings and position. Tighten the retaining bolts to ensure a tight fit between the cutter shaft and the new cutter. After installation, manually rotate the cutter shaft to check for smooth rotation and any collisions with other components.
b.Cutter Breakage
Cutter breakage is usually caused by hard foreign objects such as metal or stone mixed into the material, or by unqualified tool material or improper installation. If a tool breakage is detected, the machine must be shut down immediately to prevent the broken tool fragments from damaging other components or causing a safety hazard. First, clear the material and tool fragments from the shredder chamber and inspect the cutter shaft, bearings, and other components for damage. If only the cutter is damaged, it should be replaced with a new one. Use a tool of the same model and material as the original to ensure the required hardness and toughness. If the cutter shaft or other components are damaged, repair or replace the damaged part before installing the new cutter. To prevent tool breakage, strengthen material feed management during daily operation and install a material screening device to prevent hard foreign objects from entering the shredder chamber.
c.Cutter Jamming
Cutter jamming manifests as the cutter shaft failing to rotate properly, resulting in strong vibration and unusual noise during operation. First, disconnect the power cord, clear the material from the shredder chamber, and inspect the cutters for any entanglement or blockage. If any entanglement is present, remove it with a tool. If the cutter remains stuck after clearing the material, check the cutter's mounting position for misalignment and whether the cutter shaft is bent. If the cutter is misaligned, loosen the fixing bolts and adjust the cutter position to ensure uniform clearance between the cutters (the clearance depends on the type of material being shredded and the requirements, typically 1-5mm). If the cutter shaft is bent, use a dial indicator to check the degree of curvature. If the curvature exceeds the allowable range, straighten the cutter shaft. After straightening, recheck the cutter clearance to ensure it meets the requirements.
3. Bearing Failure
The bearings support the shredder's cutter shaft and motor shaft. Bearing failure can cause unstable operation, increased noise, and even more serious component damage. Common failures include abnormal bearing noise, heating, and bearing damage.

a.Abnormal Bearing Noise
A rustling, gurgling, or metallic clanking sound during operation is a typical sign of bearing failure. First, determine the source of the noise. Use a stethoscope or a long screwdriver (place one end of the screwdriver against the bearing seat and the other end against your ear) to listen to the bearing's operating sound to determine whether the problem lies with the motor bearing or the blade shaft bearing. If the noise is coming from the motor bearing, remove the motor end cap and inspect the bearing for wear, corrosion, missing balls, or a damaged retainer. If the bearing is damaged, replace it with a new one. Use a bearing that matches the original model. Before installation, fill the bearing with an appropriate amount of grease (usually 1/2-2/3 of the bearing's internal clearance). During installation, ensure the bearing has the required clearance between the shaft and the bearing seat, avoiding over-tightening or under-tightening. If the noise is coming from the blade shaft bearing, disassemble the shredder's bearing seat, remove the bearing, and inspect it. If the bearing is damaged, clean any impurities from the seat before installing a new bearing. After installation, adjust the bearing's axial clearance to ensure smooth blade shaft rotation.
b.Bearing Overheating
Bearing overheating is often caused by poor lubrication, improper installation, or bearing wear. First, check the bearing lubrication to ensure sufficient grease and that the oil is of good quality. If the grease is insufficient, refill it. If the grease is deteriorating, thoroughly clean the old grease from the bearing and refill it with fresh grease. Next, check the bearing installation. If the bearing is overtightened, internal friction will increase, generating excessive heat. The bearing installation clearance needs to be readjusted. If the bearing seat and bearing are loose, the bearing will wobble during operation and generate heat. The bearing seat needs to be replaced or repaired with a sleeve. Furthermore, if the bearing is worn, friction between the ball and raceway will increase, generating heat. The bearing needs to be replaced promptly to prevent further damage.
c.Bearing Damage
If the bearing is severely worn, the ball is broken, or the cage is broken, it needs to be replaced immediately. Before replacement, remove related components such as the motor end cover, blade shaft cover, and bearing seat. Use specialized tools during disassembly to avoid damaging the shaft or bearing seat by force. After disassembly, clean the mounting surfaces of the shaft and bearing seat to remove rust, debris, and old grease. Then install the new bearing. For bearings with an interference fit, heating (place the bearing in 80-100°C hot oil for 5-10 minutes) can be used to expand the inner bore of the bearing, facilitating installation. During installation, ensure the bearing is installed in the correct orientation to avoid reverse installation. After installation, manually rotate the shaft to check for smooth bearing operation and any sticking. Also, check that the axial and radial clearances of the bearing meet the requirements.
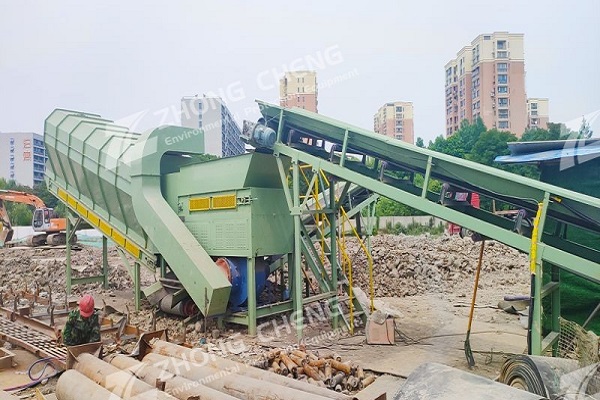
4. Feed System Failure
Feed system failures can prevent material from entering the shredder chamber properly, affecting production efficiency. Common failures include feed port blockage, uneven feed speed, and feed conveyor belt failure.

a.Feed Port Blockage
Feed port blockage is usually caused by excessive feed speed, excessive moisture in the material, or the presence of large, irregular foreign matter in the material. If the feed port is blocked, immediately stop feeding, disconnect the shredder power supply, and use tools (such as a hook or shovel) to clear the blockage. Exercise caution when clearing the feed port and avoid inserting your hands into the feed port. After cleaning, check the feed inlet for proper protection. If damaged, repair it promptly to prevent foreign matter from entering. To prevent the feed inlet from clogging, control the feed rate during daily use to ensure the feed volume matches the equipment's processing capacity. For materials with high moisture content, dry them first. Install a screen or screening device at the feed inlet to intercept large, irregular-shaped foreign matter.
b.Uneven Feed Speed
Uneven feed speed can cause load fluctuations in the shredder, affecting shredding efficiency and even causing equipment failure. If a conveyor belt is used for feeding, check the belt tension for appropriate tension. If the belt is too loose, it will slip and slow the feed rate. If it is too tight, it will increase wear on the belt and rollers. Adjust the belt tensioner to ensure the proper tension. Also, check the conveyor belt's drive motor and reducer for proper operation. If the motor speed is unstable or the reducer is faulty, repair or replace it promptly. If manual feeding is used, establish appropriate feeding procedures to ensure uniform feeding and avoid sudden changes in speed.
c.Feed Conveyor Belt Failures
Common feed conveyor belt failures include belt deviation, belt damage, and roller failure. If the conveyor belt is deviating, check the rollers for parallelism. If not, adjust the roller installation position so that the roller axis is perpendicular to the centerline of the conveyor belt. Also, check the flatness of the conveyor belt joints. If not, re-align the conveyor belt. If the conveyor belt is damaged, repair it according to the severity of the damage. Minor damage can be repaired with special conveyor belt repair adhesive, while larger damage requires replacing the conveyor belt. If the roller fails, such as sticking or making unusual noises, check the roller bearings for damage. If damaged, replace the bearings. If the roller surface is severely worn, replace the roller.
Daily Maintenance of Shredders

Daily maintenance is key to reducing shredder failures and extending equipment life. The following maintenance tasks should be performed regularly, and the maintenance details and results should be recorded in the equipment maintenance log for easy traceability and management.
1. Regular Lubrication
The lubrication system is crucial to the proper operation of the shredder. Lubricate all lubrication points regularly according to the equipment manual. Motor bearings should generally be relubricated every 3-6 months, blade shaft bearings every 1-2 months, and the feed conveyor roller bearings every 2-3 months. When relubricating, select a grease type that matches the equipment's requirements and avoid mixing different types of grease. Also, control the amount of grease added; excessive or insufficient grease can affect lubrication. Additionally, the oil level and quality of the lubricating oil tank should be regularly checked. If a gear reducer is used, the gear oil should be replaced every 6-12 months. During this replacement, the old oil in the tank must be thoroughly cleaned and fresh oil added.
2. Component Inspection and Tightening
Perform a comprehensive weekly inspection of all shredder components, particularly checking for loose bolts (such as the body bolts, blade shaft mounting bolts, and motor mounting bolts). If any looseness is detected, tighten them to the specified torque with a wrench to prevent loose components from causing damage to the equipment.
Minor wear can be repaired by grinding. Check the integrity of safety components such as protective covers and safety rails. Repair or replace any damage promptly. Check the insulation of electrical circuits for damage and loose terminals. Any problems found should be addressed promptly to prevent electrical failures.
3. Cleaning
After each day's operation, clean the shredder to remove any remaining material from the shredding chamber to prevent it from caking and rusting, which could affect subsequent use. Also, remove dust and debris from the surface of the equipment to maintain a clean appearance. Clean the cooling system weekly, removing dust from the motor cooling fan, heat sink, and fan cover to ensure unobstructed heat dissipation and prevent motor overheating. Thoroughly clean the feed inlet, conveyor belt, and other areas monthly to remove accumulated oil, debris, and prevent component clogging or damage.
Maintenance Safety Precautions

During shredder maintenance, strictly adhere to safety procedures to avoid personal injury and equipment damage. Pay special attention to the following:
Before maintenance, disconnect the main power supply to the equipment and display warning signs. Never perform maintenance operations while the equipment is energized. If the equipment involves hydraulic or pneumatic systems, release the system pressure to ensure it is depressurized before performing maintenance.
During maintenance, use appropriate tools. Do not use damaged or unqualified tools to prevent component damage or personal injury. When using power tools, check the insulation of the tools to prevent electric shock.
When removing and installing heavy components (such as blade shafts and motors), use lifting equipment such as cranes and jacks. Ensure the lifting equipment's load capacity meets the requirements. Ensure that a dedicated person is on duty to prevent falling components and injury. After repair, the equipment must undergo a trial run. Before the trial run, check that all components are correctly installed, securely fastened, and that electrical wiring is properly connected. During the trial run, the equipment should first be operated at no load to observe for abnormalities such as unusual noises, vibration, and heat generation. Once the no-load operation is normal, a loaded trial run should be performed to ensure the equipment is operating normally before it can be put into full operation.

Maintenance personnel must possess relevant professional knowledge and operational skills. Personnel unfamiliar with the equipment's structure and maintenance methods are strictly prohibited from performing repairs without authorization. If any unresolvable problems are encountered during maintenance, contact the equipment manufacturer or professional maintenance personnel immediately to avoid escalating problems caused by blind repairs.
With the above systematic maintenance methods and measures, operators and maintenance personnel can effectively address common shredder malfunctions, ensuring the equipment is always in good working order and providing stable production for the company. During actual maintenance, it is also necessary to flexibly adjust maintenance strategies based on the specific shredder model, operating environment, and operating conditions, continuously accumulate maintenance experience, and improve maintenance efficiency and quality.


Company: Zhengzhou ZhongCheng environmental protection equipment co., LTD

Company address: 36 xueyuan road, Zhengzhou City, Henan Province, China.

Whatsapp:+86-18738194110


Our Email

Our phone
 86-18738194110
 86-18738194110

Save Time! Get A Detailed Quotation Quickly.


 2026-04-22