Consulting
Service
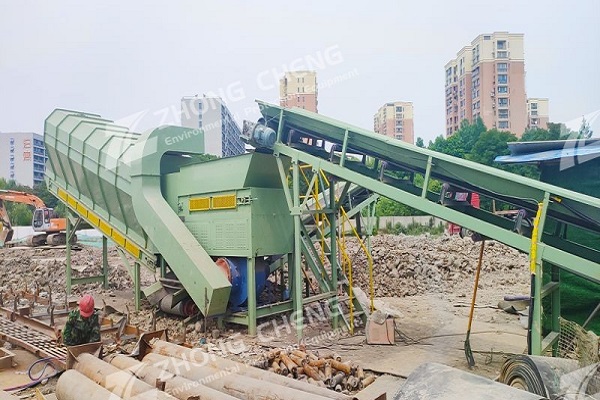
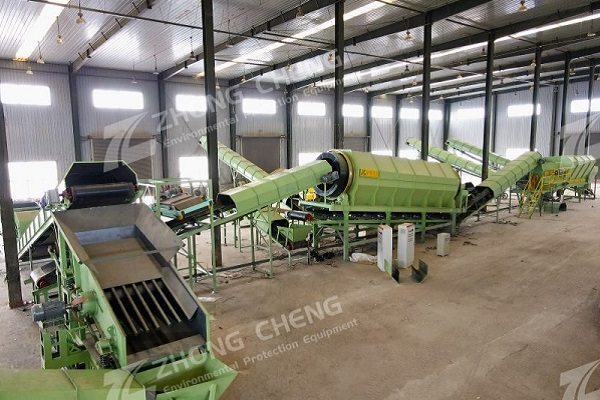
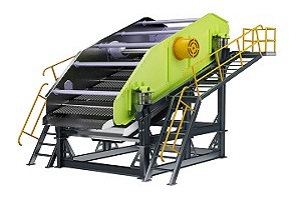
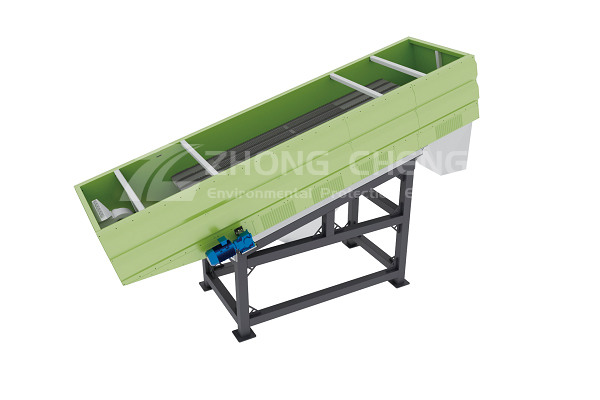
Vibrating screens, core equipment for material screening in industrial production, are widely used in the mining, chemical, building materials, and food industries. They are subject to constant high-frequency vibration, leading to a high risk of component wear and failure. Scientific daily maintenance and timely repairs are crucial to ensuring stable equipment operation, extending service life, and reducing production losses. This article systematically reviews vibrating screen maintenance and repair techniques from three perspectives: daily maintenance essentials, common troubleshooting, and repair safety standards.
Daily Maintenance Essentials for Vibrating Screens
Daily maintenance should adhere to the principle of "prevention first, regular inspection, and timely maintenance." This system covers the overall structure, core components, and auxiliary systems of the equipment. It can be divided into three levels: daily inspection, weekly maintenance, and monthly overhaul, forming a comprehensive maintenance system.

1. Daily Inspection: Basic Operating Condition Control
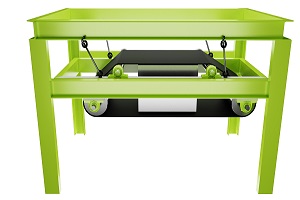
Perform a basic inspection of the vibrating screen before and after daily startup and shutdown, focusing on the equipment's safety status before operation and signs of wear after operation to promptly identify potential hazards. Appearance and Connection Inspection: Before starting the machine, inspect the screen body and frame for deformation or cracking. Check the bolt connections—especially those connecting the screen box to the vibrator, and the frame to the support spring. If any bolts are loose, tighten them with a torque wrench to the specified torque (typically 80-120 N·m; refer to the equipment manual for details) to prevent high-frequency vibration from causing bolts to fall out and cause equipment movement.
Lubrication System Inspection: Check the lubricant level in the vibrator bearings. The oil level should be maintained at 1/2-2/3 of the way above the oil gauge mark. If the oil level is too low, add the appropriate type of lubricant (typically 3# lithium-based grease or industrial gear oil; avoid mixing different types of grease). Also, inspect the lubricant for deterioration. If the oil appears dark, turbid, or contains impurities, replace it immediately to prevent dry friction caused by poor lubrication. Operating status monitoring: After powering on the machine, listen to the operating sound of the equipment. Under normal conditions, the vibrating screen should emit a uniform humming sound. If any unusual noises (such as metallic clanging or harsh friction) are heard, the machine should be stopped and inspected immediately. Check the screen tension. If the screen is loose or damaged, the material screening efficiency will decrease, and the tensioning device should be adjusted or the screen replaced promptly. Additionally, monitor the motor temperature. The motor surface temperature should not exceed 70°C during operation. If the temperature is too high, it may indicate motor overload or bearing failure, requiring shutdown and investigation.
2. Weekly Maintenance: Component In-Depth Maintenance
The vibrating screen requires more detailed maintenance every week, focusing on high-wear parts and the drive system to extend component life and prevent accumulating failures. Screen and Frame Maintenance: Remove the edge strips and check for blockage. If material adheres, rinse the screen with a high-pressure water jet (control the water pressure at 0.3-0.5 MPa) or clean it with a soft brush to avoid scratching the screen with hard tools. Check the welds of the screen frame for cracks. If cracks are found, grind them with an angle grinder and then repair them with arc welding. After repairing, polish them flat to prevent material accumulation.
Support Spring Maintenance: Support springs are key components for vibration dampening and stabilizing the screen. Check for deformation, aging, or breakage. Measure the spring height. If the height difference between springs in the same set exceeds 5mm, uneven force will be applied to the screen and the springs must be replaced with the same specification. Clean dust and material residue from the spring surface and apply anti-rust grease to prevent rust. Vibrator Maintenance: Open the vibrator cover and inspect the internal bearings for wear. If pitting, scratches, or a gap exceeding 0.15mm appears on the bearing raceway, replace the bearings. Also, inspect the eccentric block inside the vibrator to ensure the bolts securing it are secure. If the eccentric block is misaligned, this will cause an imbalance in the excitation force. Adjust the eccentric block angle to the specified value (typically 60°-120°, adjusted based on screening requirements).
3. Monthly Inspection: System Performance Evaluation

Perform a comprehensive monthly inspection of the vibrating screen. Based on operational data, evaluate overall performance, replace aging components, and optimize operating parameters. Motor and Drive System Inspection: Check the terminals in the motor junction box for looseness. If there are signs of oxidation, sand them and retighten them. Measure the motor insulation resistance; it should be greater than 0.5MΩ. If it is lower than the standard, dry the motor. Inspect the V-belt drive system to check for cracks and wear. Measure the belt tension. Press the center of the belt; the deflection should be between 10-15mm. If it does not meet the requirements, adjust the motor position or replace the belt.
Seal and Guard Inspection: Check the equipment's dust cover and the gaskets at the feed and discharge ports. If the gaskets are aged or damaged, replace them to prevent dust leakage and contamination of the environment and materials. Check the safety guardrails and covers for integrity. If they are deformed or missing, repair them promptly to ensure operator safety. Performance parameter calibration: Evaluate the equipment's operating status through screening efficiency testing (taking samples of the screened material and calculating the percentage of qualified material). If the screening efficiency is less than 90%, analyze the cause—possibly screen blockage, insufficient excitation force, or uneven material feed—and make targeted adjustments. Also, calibrate the vibration frequency and amplitude. Use a vibration tester to measure the screen vibration amplitude to ensure it falls within the specified range (typically 1.5-5mm). If the amplitude is abnormal, adjust the exciter eccentric or check the support spring stiffness.
Common Vibrating Screen Troubleshooting Techniques
Vibrating screens are prone to exciter failure, screen damage, motor overheating, and abnormal screen vibration during operation. Accurately identify the cause based on the symptoms and implement scientific repair methods to prevent further escalation.
1.Vibrator Failure: Repair of Core Transmission Components

The vibrator is the power source of the vibrating screen. Common failures include bearing damage, oil leakage, and unbalanced excitation force. Maintenance requires attention to component precision and assembly workmanship. Bearing Damage Repair: If the vibrator makes a grinding noise or experiences a sudden temperature rise, it's likely a bearing failure. Repair procedures include: first disconnect the equipment from the power supply, remove the vibrator end cap and bearing seat, use a puller to remove the damaged bearing, and clean any impurities and old grease from the bearing seat. Inspect the bearing seat bore for wear. If the bore wear exceeds tolerance (tolerance exceeding 0.05mm), spray repair techniques or replace the bearing seat are necessary. When installing a new bearing, heat it in lubricating oil at 80-100°C for 5-10 minutes (shrink fit). Allow the bearing inner ring to expand and quickly install it into the shaft journal. After cooling, add new grease. Finally, install the end cap and tighten the bolts.
Vibrator Oil Leakage Treatment: If oil leaks at the junction of the vibrator end cap and housing, it may be due to aging of the gasket or uneven tightening of the bolts. First, remove the end caps and replace the oil-resistant rubber gaskets (usually 3-5mm thick). Clean the mating surfaces of oil and impurities. When reinstalling the end caps, tighten the bolts in diagonal steps, ensuring uniform torque (typically 50-80 N·m) to prevent uneven force on the mating surfaces and oil leakage. If the shaft end seal is leaking, replace the skeleton oil seal. When installing, ensure that the oil seal lip faces the grease side to avoid reverse installation.
Repairing Excitation Force Imbalance: If the screen body oscillates left and right and screening efficiency decreases, it is likely due to an imbalance in the excitation force. After shutting down the machine, inspect the exciter eccentric block. If the eccentric block bolts are loose, retighten and lock them. If the eccentric block is worn, resulting in uneven quality, replace it with an eccentric block of the same specification. After replacement, adjust the angle between the two sets of eccentric blocks to be consistent (with a tolerance of no more than 2°) to ensure symmetrical excitation force. Finally, start the machine for a test run to observe whether the screen body vibrates smoothly.
2. Screen Damage: Screening Component Replacement and Repair

Screens are components that come into direct contact with the material and are susceptible to damage from impact, abrasion, or improper tensioning. Repair options include either repair or replacement, depending on the severity of the damage.
Partial Damage Repair: If the screen only has small holes (less than 50mm in diameter), repairs can be performed by welding or gluing. For metal screens, spot weld with wire of the same material as the screen. After repairing, use an angle grinder to smooth the area to avoid protrusions that may obstruct material screening. For polyurethane screens, apply a patch using a specialized polyurethane glue. The patch should be 20-30mm larger than the damaged area. After application, press for 1-2 hours to ensure the glue cures.
Extensive Damage Replacement: If damage exceeds 30% of the screen, the entire screen must be replaced. The replacement procedure is as follows: Remove the holding strip bolts from the edge of the screen frame, remove the old screen, and clean any debris from the support surface of the screen frame. Lay the new screen flat on the screen frame, ensuring alignment and no offset. Install the holding strips and tighten the bolts at intervals of 150-200mm. Apply even force during tightening to avoid areas of the screen being under-tensioned. Finally, check the screen for flatness. If wrinkles are present, readjust the tension to prevent breakage during operation.
3. Motor Overheating: Power System Troubleshooting
Motor overheating is a common problem in vibrating screens. If not addressed promptly, it may cause the motor to burn out. Repairs should be conducted from three perspectives: load, heat dissipation, and bearings.
Motor Overload Repair: If the motor current exceeds the rated value (which can be monitored with an ammeter), it is likely due to material overload or a clogged screen. First, stop the machine to clean any blockages in the screen. Adjust the feed rate to the rated capacity (refer to the equipment manual). If material accumulates at the feed inlet, check the feed conveyor speed to ensure even feeding and avoid sudden influx of material into the screen, which could overload the motor. Also, check the motor wiring for correct wiring. If the star-delta starting system is incorrectly wired, the motor starting current will be excessive, requiring rewiring according to the circuit diagram.
Poor heat dissipation: Excessive dust on the motor surface or a damaged cooling fan can cause poor heat dissipation. First, clean dust and oil from the motor housing and heat sink to ensure unobstructed heat dissipation. Check the cooling fan blades for breakage. If the fan is damaged, replace it with a similar model. Also, check the fan cover to ensure it is intact and prevent foreign matter from entering the fan. If the motor's operating temperature is too high (over 40°C), install ventilation or a sunshade to reduce the ambient temperature.
Bearing repair: If the motor bearings are hot (over 80°C), this is likely due to poor lubrication or wear. First, remove the motor end cover and check the bearing lubrication. If the grease has dried out, clean out the old grease and refill with new grease (filling 1/2-2/3 of the bearing's internal space). If the bearing is severely worn (such as raceway spalling or ball deformation), replace it with a new one. Ensure the bearing model matches the motor when replacing it. After installation, manually rotate the motor shaft to ensure there is no binding.
4. Abnormal Screen Vibration: Overall Structural Adjustment

Abnormal screen vibration (such as back and forth movement or up and down bouncing) is often due to an imbalance in the support system or excitation system, requiring structural adjustment and repair.
Repairing Support Spring Faults: Inconsistent support spring height or stiffness can cause the screen to tilt and vibrate. First, measure the height of each set of springs and replace any springs with a height difference exceeding 5mm to ensure uniform spring specifications. If the springs are offset, adjust the spring seat so that the spring centerline aligns with the screen support point to prevent offset. Also, check if the springs are colliding with other components. If so, reposition the components or install cushioning pads. Insufficient Screen Rigidity: Significant deformation or cracked welds can cause abnormal vibration. To correct deformation, use a jack and flame heating (control the temperature between 600-800°C) to slowly straighten the screen. For cracked welds, first grind the cracks until the metallic luster is exposed, then repair them with multiple layers of welding. After welding, perform stress relief treatment (such as tapping the weld or low-temperature tempering) to prevent further cracking. If the screen is severely deformed, replace the screen frame to ensure the structural strength of the equipment.
Adjusting Vibrator Installation Deviation: If the vibrator axis is not parallel to the screen centerline, it will cause lateral vibration of the screen. After shutting down the machine, measure the parallelism of the vibrator axis and the screen centerline. If the deviation exceeds 0.1mm/m, adjust the vibrator mounting bracket by adding or removing shims to correct the axis position. After adjustment, tighten the mounting bolts to ensure a secure connection between the vibrator and the screen. Start the machine for a test run to observe whether the screen vibration returns to normal.
Vibrating screens require daily, weekly, and monthly inspections, covering key aspects such as appearance, lubrication, and component wear. Troubleshooting focuses on specific issues like anomalies with the vibrator, screen, motor, and screen body, requiring targeted treatment. Safety regulations, such as power outages and protective equipment, must be strictly adhered to throughout the maintenance process. These safety measures ensure stable equipment operation, extend service life, and minimize production losses.


Company: Zhengzhou ZhongCheng environmental protection equipment co., LTD

Company address: 36 xueyuan road, Zhengzhou City, Henan Province, China.

Whatsapp:+86-18738194110


Our Email

Our phone
 86-18738194110
 86-18738194110

Save Time! Get A Detailed Quotation Quickly.


 2026-04-22