Consulting
Service
This article is a guide to trommel screen maintenance. It begins with pre-repair preparation, including tools (general and specialized), personnel (professional skills and protective gear), and equipment shutdown inspections (power off, tag out, and initial visual inspection). It then details five common faults, analyzes their causes, and provides repair steps, such as checking the motor if the drum doesn't rotate, and low screening efficiency and speed. It also covers routine maintenance and repair safety, helping maintenance personnel perform efficient and safe repairs and ensure equipment operation.
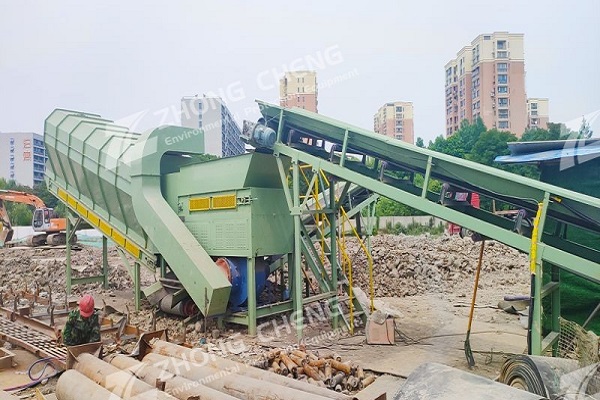
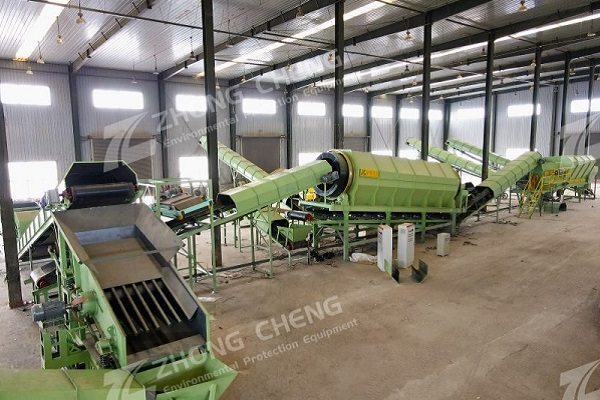
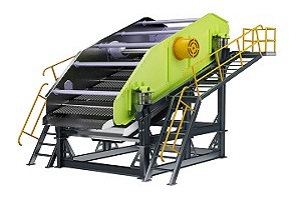
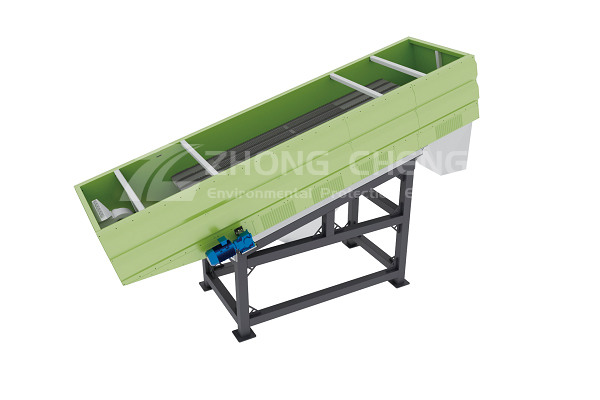
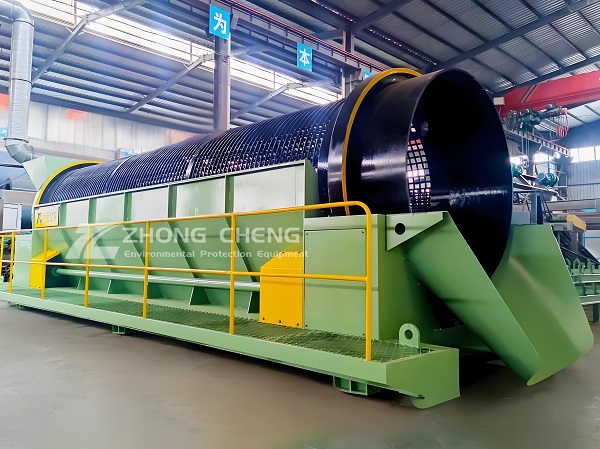
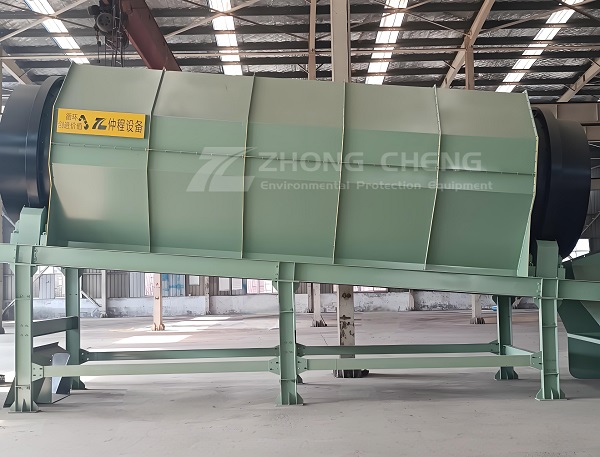
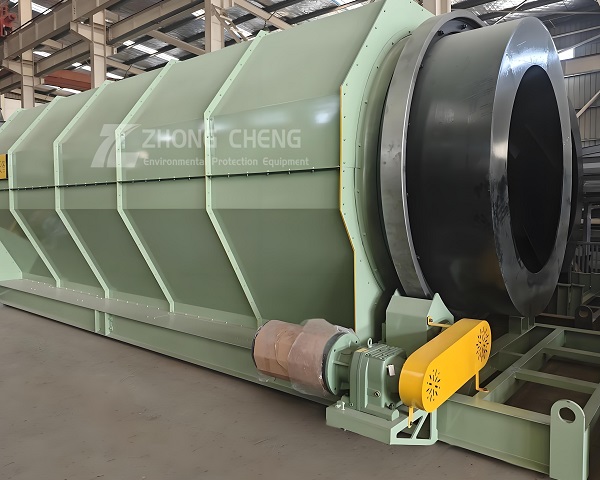
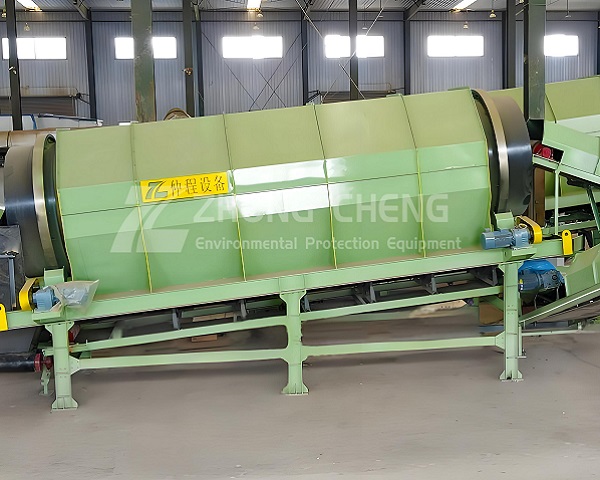
As a highly efficient screening device, trommel screens are widely used in various industries, including mining, building materials, chemicals, and grain. Over long-term operation, trommel screens are prone to various faults due to factors such as material wear, component aging, and improper operation, which can affect production efficiency. Therefore, mastering scientific and standardized maintenance methods is crucial. This article will provide detailed trommel screen maintenance knowledge, covering pre-repair preparation, common fault repairs, routine maintenance, and maintenance safety precautions, to help maintenance personnel complete repairs efficiently and safely.
Pre-repair Preparation
Before performing trommel screen repairs, thorough preparation is essential to ensure a smooth and successful repair. This primarily involves preparing tools, personnel, and performing equipment shutdown inspections.
1. Tool Preparation
Drum screen maintenance requires a variety of tools. Maintenance personnel must prepare all tools in advance to avoid delays due to missing tools. Common tools are mainly divided into general tools and special tools. General tools include wrenches (open-end wrenches, ring wrenches, socket wrenches, etc., with different sizes required to handle different bolt and nut sizes), screwdrivers (slotted and Phillips screwdrivers, also in different sizes), pliers (needle-nose pliers, diagonal pliers, vises), hammers (ball-peen hammers, claw hammers), tape measures, levels, multimeters, etc. Special tools vary depending on the specific model and structure of the trommel, such as pullers for drum removal, bearing installation tools, and belt tensioning tools. When preparing tools, check for integrity and accuracy, such as checking wrenches for cracks and multimeters for accurate calibration, to ensure proper function.
2. Personnel Preparation
The professional quality of maintenance personnel directly affects the quality and efficiency of maintenance. Personnel involved in trommel screen maintenance must possess relevant professional knowledge and skills and be familiar with the structure, operating principles, and functions of each component. Before any maintenance work begins, maintenance personnel should receive technical training and safety briefings to ensure they understand the maintenance tasks, objectives, specific steps, and potential safety risks and countermeasures. Furthermore, clear division of labor should be established among maintenance personnel, such as those responsible for disassembling components, inspecting component wear, and replacing new components, to ensure the smooth progress of maintenance work. Furthermore, maintenance personnel must wear necessary labor protection equipment, such as hard hats, non-slip gloves, protective glasses, work clothes, and non-slip shoes, to ensure their own safety.
3. Equipment Shutdown Inspection
Before beginning any maintenance, the trommel screen must be shut down and relevant safety measures implemented to prevent accidental startup. First, disconnect the power to the trommel screen and turn off the main switch. A "Maintenance in Progress, Do Not Close" warning sign should be hung at the switch to prevent accidental startup. Then, conduct a preliminary inspection of the equipment to observe whether there is any obvious damage to the appearance of the drum screen, such as whether the drum shell is deformed or cracked, whether the feed port and discharge port are blocked, whether the conveyor belt is deviated or damaged, etc. At the same time, check whether the bolts and nuts at the various connection parts of the equipment are loose, whether there is oil leakage in the bearing seat, and whether the operating sound of the motor and reducer is normal (you can listen before shutting down). Through the preliminary inspection, you can roughly determine the location and possible causes of the fault, and provide direction for subsequent detailed maintenance.
Common faults and maintenance methods
During the operation of the drum screen, common faults include the drum not rotating or rotating slowly, low screening efficiency, abnormal equipment vibration, bearing overheating, and motor failure. For different faults, corresponding maintenance methods need to be adopted.
A. The drum does not rotate or rotates slowly
1. Cause of fault
(1) Motor failure: motor phase loss, motor winding burnout, motor bearing damage, etc., resulting in the motor not being able to work normally or insufficient output power, thus causing the drum to not rotate or rotate slowly
(2) Reducer failure: Severe wear of the gears inside the reducer, insufficient gear oil or deterioration of gear oil, damage to the reducer bearings, etc., will cause the transmission efficiency of the reducer to decrease, thereby affecting the rotation of the drum.
(3) Drive belt problem: The drive belt is loose, causing slippage between the belt and the pulley, and the power cannot be effectively transmitted; if the belt is broken, the power cannot be transmitted at all, causing the drum to stop rotating; in addition, the deformation, wear or installation position offset of the pulley will also affect the transmission effect of the belt.
(4) Drum internal blockage: Too much material accumulates inside the drum, blocking the screen, increasing the running resistance of the drum, causing the drum to rotate slowly or even not rotate.
(5) Bearing damage: Severe wear or damage of the bearings at both ends of the drum will increase the rotation resistance of the drum, resulting in slow rotation or no rotation.
2. Maintenance steps
(1) Check the motor: First, use a multimeter to check whether the power supply of the motor is normal and check whether there is a phase loss. If the power supply is normal, check the motor winding and measure the insulation resistance of the winding. If the insulation resistance is too low or zero, it means that the motor winding is burned out and needs to be replaced or a new motor needs to be replaced. At the same time, check the motor bearings and turn the motor shaft by hand to feel whether there is any jamming or abnormal noise. If the bearings are damaged, the motor needs to be disassembled, replaced with new bearings, and an appropriate amount of grease needs to be added.
(2) Check the reducer: Open the observation hole or oil drain hole of the reducer and check the oil volume and oil quality of the gear oil in the reducer. If the oil volume is insufficient, add the corresponding type of gear oil; if the oil quality is deteriorated (such as black oil color, impurities, etc.), drain all the old oil, clean the inside of the reducer, and add new gear oil. Then, check the gears in the reducer. If the gears are severely worn or broken, the damaged gears need to be replaced. In addition, check the reducer bearings. If the bearings are damaged, the reducer needs to be disassembled and replaced with new bearings.
(3) Check the drive belt and pulley: Observe the tension of the drive belt and press the belt with your fingers. If the pressure is too large (normal pressure is 10-15mm), it means that the belt is loose and the belt tensioning device needs to be adjusted to tighten the belt. If the belt is broken, it needs to be replaced with a new belt. When replacing, be sure to select a belt of the same model as the original belt and ensure that the belt is installed in the correct position to avoid deviation. Check the pulley. If the pulley is deformed, severely worn, or the installation position is offset, it needs to be repaired or replaced, and the installation position of the pulley needs to be adjusted to ensure that the axes of the two pulleys are parallel and the groove centers of the pulleys are aligned.
(4) Clean the drum: If the drum is blocked, first clean the feed and discharge ports of the drum screen, then open the inspection door of the drum (if any), or remove part of the screen, and use tools (such as rakes, shovels, etc.) to clean out the materials accumulated inside the drum. During the cleaning process, be careful to avoid damaging the screen and the internal structure of the drum. After cleaning, check whether the screen is damaged. If damaged, repair or replace it in time.
(5) Check and replace bearings: Remove the bearing seats at both ends of the drum, remove the bearings, and check the wear of the bearings. If the bearing raceways or rolling elements have defects such as wear, pitting, or cracks, new bearings need to be replaced. When replacing bearings, choose bearings of the same model as the original bearings, add an appropriate amount of grease to the bearings, and then install the bearings back to the bearing seats in the correct installation order to ensure that the bearings are firmly installed and operate flexibly.
B. Low screening efficiency

1. Causes of failure
(1) Damaged or blocked screen: Damaged or holes in the screen will cause unqualified materials to pass through the screen, affecting the screening quality; the screen aperture is blocked by material particles, which will prevent the material from passing through the screen normally, reducing the screening efficiency.
(2) Unreasonable drum speed: Too high or too low drum speed will affect the screening effect. When the speed is too high, the centrifugal force on the material in the drum is too large, and the material will stick to the inner wall of the drum and cannot fully contact and screen the screen; when the speed is too low, the material is not turned over enough in the drum, and the screening time is not enough, which will also lead to reduced screening efficiency.
(3) Improper feed rate: If the feed rate is too large, the material will accumulate too much in the drum, and the materials will squeeze each other, making it impossible to fully screen. It may also cause the drum to clog; if the feed rate is too small, it will cause equipment waste and the screening efficiency cannot be fully utilized.
(4) The moisture content of the material is too high: When the moisture content of the material is too high, the material is easy to agglomerate. The agglomerated material cannot pass through the screen and will clog the screen, thereby reducing the screening efficiency.
(5) The inclination angle of the drum is not suitable: If the inclination angle of the drum is too large, the material moves too fast in the drum, the screening time is shortened, and the screening is insufficient; if the inclination angle is too small, the material moves too slowly and is easy to accumulate in the drum, which also affects the screening efficiency.
2. Maintenance steps
(1) Check and maintain the screen: Check the integrity of the screen regularly. If the screen is found to be damaged or has holes, it needs to be repaired or replaced in time. When repairing the screen, welding, patching, etc. can be used; when replacing the screen, ensure that the specifications and aperture of the screen are consistent with the original screen, and fix the screen firmly to avoid loosening during operation. For the problem of screen blockage, you can choose a suitable cleaning method according to the nature of the material, such as flushing with a high-pressure water gun (suitable for water-soluble or non-damaged materials), cleaning with a brush (suitable for materials with large particles and non-agglomerated materials), beating the screen (suitable for more serious blockage, but pay attention to the force to avoid damaging the screen), etc.
(2) Adjust the drum speed: Adjust the drum speed according to the design parameters of the drum screen and the characteristics of the material. Generally speaking, the speed of the drum screen can be achieved by adjusting the speed of the motor or changing the transmission ratio of the reducer. When adjusting the speed, multiple tests are required to find the most suitable speed so that the material can be fully turned and screened in the drum to improve the screening efficiency.
(3) Control the feed volume: According to the rated processing capacity of the drum screen, the feed volume should be reasonably controlled. Flow control devices such as gates and feeders can be installed at the feed port to adjust the feed volume in real time to ensure that the feed volume is uniform and stable, neither too much nor too little, so that the equipment is always in the best operating state.
(4) Handling high-moisture content materials: If the moisture content of the material is too high, the material can be pre-treated before screening, such as drying, drying, etc., to reduce the moisture content of the material and prevent the material from agglomerating and clogging the screen. A heating device can also be installed on the drum screen to heat and dry the material in the drum to improve the screening efficiency.
(5) Adjust the drum installation inclination angle: Check the drum installation inclination angle. If it does not meet the design requirements, it needs to be adjusted. The installation inclination angle of the drum screen is generally between 5° and 15°. The specific angle needs to be determined according to the fluidity of the material and the screening requirements. When adjusting, it can be achieved by adjusting the height of the equipment's support legs. After adjustment, ensure that the axis of the drum is on the same horizontal plane and the equipment runs stably without obvious vibration.
C. Abnormal equipment vibration

1. Causes of failure
(1) Weak foundation: Insufficient foundation strength of the drum screen, cracked concrete foundation, loose foundation bolts, etc. will cause the equipment to vibrate during operation.
(2) Unbalanced components: The mass distribution of the drum itself is uneven and there is eccentricity; the rotor of the motor and reducer is unbalanced, which will generate centrifugal force when rotating at high speed, causing equipment vibration.
(3) Bearing wear or damage: Severe bearing wear or damage will cause the bearing to run inflexibly, generate vibration, and transmit it to the entire equipment.
(4) Transmission system failure: Inconsistent transmission belt tension, non-parallel pulley installation, too large or too small gear meshing clearance, etc. will cause the transmission system to run unstable and generate vibration.
(5) Material overload: Material segregation during feeding causes uneven distribution of material in the drum, with more on one side and less on the other, causing the drum to be subjected to unbalanced force, thus generating vibration.
2. Maintenance steps
(1) Strengthen the equipment foundation: First, check the condition of the equipment foundation. If the foundation bolts are loose, tighten the bolts with a wrench; if the foundation concrete is cracked, repair the cracks. Use epoxy resin mortar and other materials to fill and reinforce them; if the foundation strength is insufficient, recast the foundation to ensure that the foundation can withstand the weight of the equipment and the impact force generated during operation.
(2) Correct the balance of parts: For the problem of roller eccentricity, the roller can be disassembled and a dynamic balance test can be performed to find the unbalanced position. Then, the roller can be balanced by adding counterweights or removing some weight. For the imbalance of the motor and reducer rotor, dynamic balance correction is also required. If the rotor is severely worn or damaged, the rotor needs to be replaced.
(3) Replace worn bearings: Check the bearings of various parts of the equipment. If the bearings are severely worn, have abnormal noise or jamming, replace them with new bearings in time. When replacing bearings, choose the appropriate model of bearings, ensure that they are installed correctly, and add an appropriate amount of grease.
(4) Repair the transmission system: Check the tension of the transmission belt and adjust the belt tensioning device to make the belt tension uniform. Check the installation of the pulleys and use a level to measure whether the axes of the pulleys are parallel. If not, adjust the installation position of the pulleys to ensure that the axes of the two pulleys are parallel. For the gear transmission system, check the meshing clearance of the gears. If the clearance is too large or too small, adjust the installation position of the gears or replace the gears to ensure good gear meshing.
(5) Adjust the feeding method: Improve the feeding device so that the material can be evenly distributed across the entire width of the drum to avoid material overloading. A distributor or guide plate can be installed at the feed port to guide the material evenly into the drum to reduce the equipment vibration caused by material overloading.
D. Bearing overheating
1. Cause of failure
(1) Poor lubrication: Insufficient grease in the bearing, deterioration of the grease or improper selection of grease type will increase the friction inside the bearing, generate excessive heat, and increase the bearing temperature.
(2) Improper bearing installation: If the bearing is installed too tight or too loose, it will affect the normal operation of the bearing. If it is too tight, the internal clearance of the bearing will be too small, increasing friction; if it is too loose, the bearing will shake during operation, which will also increase friction and cause the bearing to overheat. In addition, if the bearing is not installed concentrically, it will also cause uneven force on the bearing and overheat.
(3) Bearing wear or damage: If the bearing raceway or rolling element is severely worn or has defects such as pitting and cracks, the friction coefficient of the bearing will increase, and a large amount of heat will be generated during operation, causing the bearing to overheat.
(4) Excessive load: During the operation of the drum screen, if the feed volume is too large, the material is too hard, or the drum is blocked, the load on the bearing will exceed the rated load, causing the bearing to overheat.
(5) Poor heat dissipation: The heat dissipation conditions around the bearing seat are poor. For example, if the outside of the bearing seat is covered with debris, the ambient temperature is too high, or the heat dissipation structure of the bearing seat itself is unreasonable, it will affect the heat dissipation of the bearing and increase the bearing temperature.
2. Maintenance steps
(1) Improve lubrication conditions: First, check the grease in the bearing. If the grease is insufficient, add an appropriate amount of grease. If the grease is deteriorating, clean out the old grease and add new grease that meets the model requirements. When selecting grease, choose the appropriate grease based on the operating temperature, speed, load, and other factors of the bearing.
Grease type, such as lithium-based grease, calcium-based grease, etc. At the same time, pay attention to the amount of grease added. Generally, the amount of grease added is 1/2-2/3 of the internal space of the bearing. Too much or too little will affect the lubrication effect.
(2) Reinstall the bearing: If the bearing is not installed properly, the bearing needs to be disassembled and reinstalled. Before installation, clean the inner hole of the bearing and the bearing seat to remove impurities and oil stains. When installing, ensure that the bearing is installed in the correct position and the clearance between the inner ring of the bearing and the shaft, and the outer ring and the bearing seat meet the requirements. Avoid overtightening or overloosening. For bearings that require heating for installation, control the heating temperature and heating time to avoid overheating and damage to the bearing. After installation, turn the bearing by hand to check whether the bearing runs flexibly and without jamming.
(3) Replace damaged bearings: If the bearing is severely worn or damaged and cannot be repaired, it needs to be replaced with a new bearing in time. When replacing, choose a bearing of the same model as the original bearing and ensure that the quality of the bearing meets the requirements. When installing new bearings, follow the correct installation steps and add an appropriate amount of grease.
(4) Reduce the equipment load: Check the feed rate of the drum screen. If the feed rate is too large, reduce the feed rate so that the equipment operates within the rated load range. If the material is too hard, crush the material first to reduce the hardness of the material and reduce the impact and load on the bearing. If the drum is blocked, clean the blocked material in time to ensure the normal operation of the drum and reduce the load on the bearing.
(5) Improve heat dissipation conditions: Clean the debris around the bearing seat and ensure good air circulation around the bearing seat to facilitate heat dissipation. If the ambient temperature is too high, install a cooling fan or cooling device near the bearing seat to reduce the ambient temperature. If the heat dissipation structure of the bearing seat is unreasonable, the bearing seat can be modified, such as adding heat sinks, to improve the heat dissipation capacity of the bearing seat.
E. Motor failure
1.Cause of failure
(1) Power supply problem: unstable power supply voltage, too high or too low voltage, power supply phase loss (three-phase motor), etc., will affect the normal operation of the motor, causing the motor to fail to start, unstable operation or burn the motor winding.
(2) Motor overload: The drum screen is overloaded, such as drum blockage, transmission system failure, etc., which will cause the motor to be in an overload state for a long time, causing the motor winding to overheat and then burn the motor.
(3) Motor winding failure: The motor winding insulation is aging, damp, corroded by oil, or short-circuited or grounded between the windings, which will cause the motor to fail to work normally and even burn the motor.
(4) Motor bearing failure: Severe wear, poor lubrication or damage to the motor bearing will cause the motor to run inflexibly, produce abnormal noise and vibration, and also cause the motor winding to overheat, affecting the service life of the motor. (5) Poor motor heat dissipation: Damage to the motor cooling fan, deformation of the fan blades, blockage of the motor housing heat sink by debris, etc., will affect the heat dissipation effect of the motor, causing the motor temperature to rise and cause failure.
2. Maintenance steps
(1) Check the power supply: First, use a multimeter to measure the power supply voltage to see if it is within the rated voltage range of the motor (the allowable deviation is generally ±5%). If the voltage is unstable, check the power supply line to eliminate problems such as poor line contact and transformer failure; if the voltage is too high or too low, take appropriate voltage stabilization measures, such as installing a voltage stabilizer. For three-phase motors, check whether there is a phase loss. You can measure whether the three-phase voltage is balanced. If there is a phase loss, check the power switch, contactor, wires and other components to find out the cause of the phase loss and repair it, such as replacing damaged contactors and wires.
(2) Eliminate motor overload: Check the load of the drum screen, find out the cause of the motor overload and eliminate it. If the drum is blocked, clean the material inside the drum; if the transmission system fails (such as the belt is too tight, the gear is stuck, etc.), repair the transmission system and restore its normal operation. At the same time, check whether the rated power of the motor matches the load of the drum screen. If the motor power is too small, replace it with a motor with appropriate power.
(3) Repair the motor winding: If the motor winding insulation is aged or damp, the winding can be dried.
Drum screen repair requires adequate preparation. Accurately check the five common faults and repair them according to the steps. Daily maintenance is also critical. Regular inspection of parts, cleaning of equipment, replacement of grease, etc. can reduce the occurrence of faults. During maintenance, it is important to pay attention to safety and strictly implement measures such as shutdown and power off. Only by standardizing maintenance and care can the service life of the drum screen be extended, its continuous and stable operation be guaranteed, and efficient production in various industries be promoted, avoiding production losses caused by equipment failure.


Company: Zhengzhou ZhongCheng environmental protection equipment co., LTD

Company address: 36 xueyuan road, Zhengzhou City, Henan Province, China.

Whatsapp:+86-18738194110


Our Email

Our phone
 86-18738194110
 86-18738194110

Save Time! Get A Detailed Quotation Quickly.


 2026-04-22